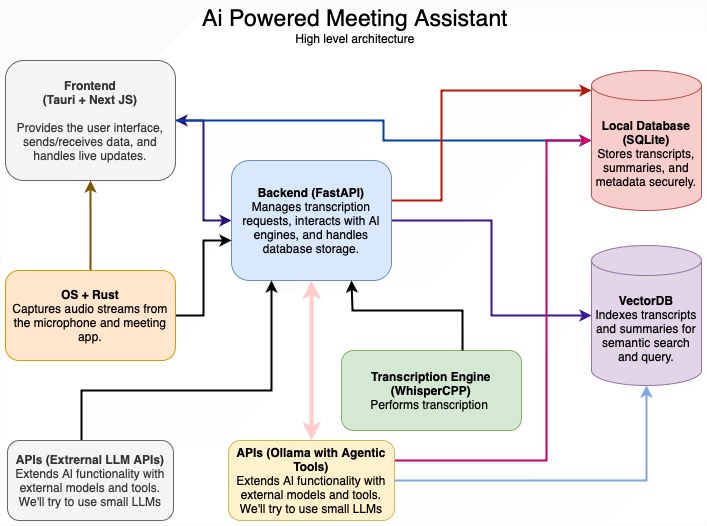
一个专为 AI 智能体设计的高性能操作系统虚拟化与控制框架。它通过轻量级、近乎原生速度的虚拟容器,让 AI Agent 能够在完全隔离的 macOS 或 Linux 环境中自动执行“用电脑”任务,如操作应用、上网、写代码、自动化复杂办公流程等,并内置多种主流 LLM(大模型)接口。
主要功能
- 高性能虚拟化:在 Apple Silicon 上运行 macOS/Linux 虚拟机,性能接近原生(90%)。
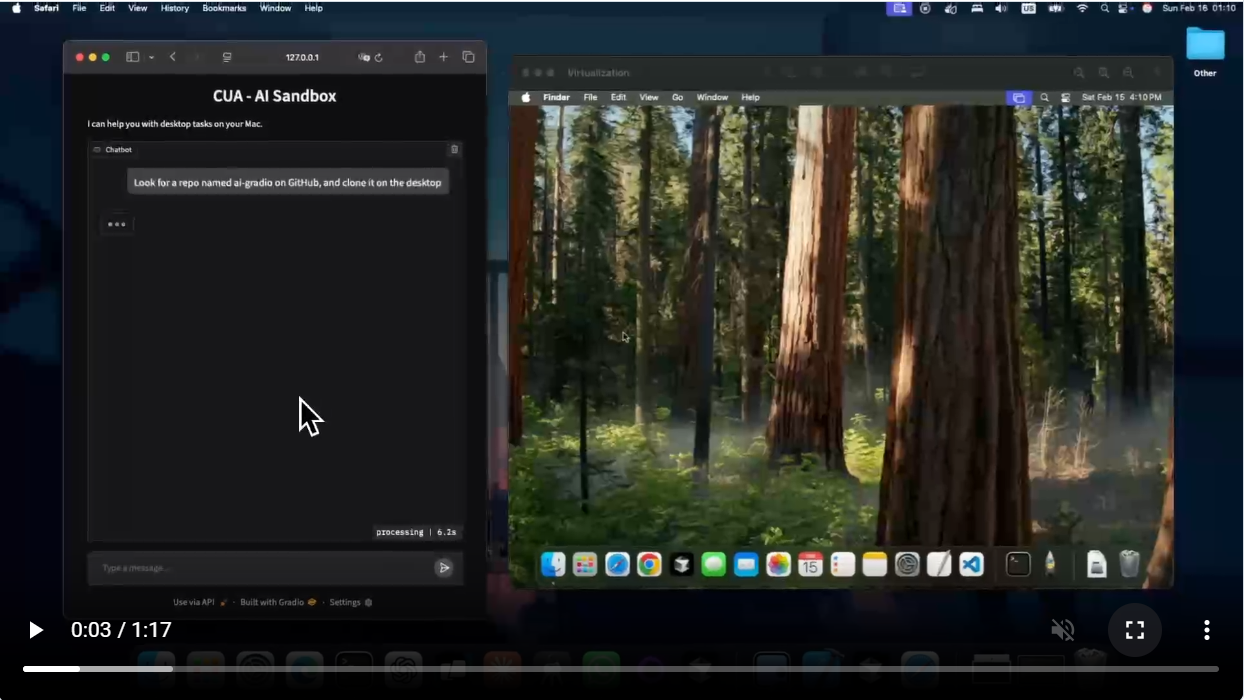
- AI 代理操作:支持 AI 在虚拟机中操作 macOS 系统及应用(如浏览器、VS Code)。
- 安全隔离:所有操作在沙盒化的虚拟环境中运行,保护主机系统。
- 多应用支持:AI 可操控虚拟机内的多种程序,实现复杂工作流。
- 兼容多种大模型:支持 OpenAI、Anthropic 的 CUA 模型,未来还将兼容 Ollama 等本地大模型。
安装和使用
系统要求
- 配备 Apple Silicon 的 Mac(M1/M2/M3/M4 系列)
- macOS 15 (Sequoia) 或更高版本
- Python 3.10+(计算机、代理和 MCP 库需要)。我们建议使用 Conda(或 Anaconda)创建临时 Python 环境。
- VM 映像的磁盘空间(建议 30GB+)
1:仅限 Lume CLI(VM 管理)
如果您只需要虚拟化功能:
/bin/bash -c "$(curl -fsSL https://raw.githubusercontent.com/trycua/cua/main/libs/lume/scripts/install.sh)"
(可选)如果您不希望 Lume 作为后台服务运行:
/bin/bash -c "$(curl -fsSL https://raw.githubusercontent.com/trycua/cua/main/libs/lume/scripts/install.sh) --no-background-service"
注意:如果您选择此选项,则需要在需要时通过在终端中运行来手动启动 Lume API 服务。这适用于完成步骤 1 后的选项 2。lume serve
有关 Lume 使用说明,请参阅 Lume 文档。
2:完整的计算机使用代理功能
如果要将 AI 代理与虚拟化环境一起使用:
-
安装 Lume CLI:
/bin/bash -c "$(curl -fsSL https://raw.githubusercontent.com/trycua/cua/main/libs/lume/scripts/install.sh)" -
拉取最新的 macOS CUA 映像:
lume pull macos-sequoia-cua:latest -
安装 Python 库:
pip install cua-computer cua-agent[all] -
在 Python 代码中使用这些库:
from computer import Computer
from agent import ComputerAgent, LLM, AgentLoop, LLMProvider

async with Computer(verbosity=logging.DEBUG) as macos_computer:
  agent = ComputerAgent(
      computer=macos_computer,
      loop=AgentLoop.OPENAI, # or AgentLoop.ANTHROPIC, or AgentLoop.OMNI
      model=LLM(provider=LLMProvider.OPENAI) # or LLM(provider=LLMProvider.ANTHROPIC)
  )

  tasks = [
      "Look for a repository named trycua/cua on GitHub.",
  ]

  for task in tasks:
    async for result in agent.run(task):
      print(result)
浏览 Agent Notebook 以获取可运行的示例。
-
或者,您可以将代理与 Gradio UI 一起使用:
from utils import load_dotenv_files
load_dotenv_files()

from agent.ui.gradio.app import create_gradio_ui

app = create_gradio_ui()
app.launch(share=False)
3:从源构建
如果您想为项目做出贡献或需要最新的 nightly 功能:
# Clone the repository
git clone https://github.com/trycua/cua.git
cd cua

# Open the project in VSCode
code ./.vscode/py.code-workspace

# Build the project
./scripts/build.sh
有关更多信息,请参阅我们的开发人员指南。